Coltrane Peak's snow mountain houses two main fights and one secret encounter. Mirren (secret) is documented on the Secret bosses hub. The two main bosses are the Icebound Cavern boss (a frost-crown humanoid in a vertical ice-cavern arena) and Locomotress Agnes (a green steam-locomotive fought on the moving train roof through the Coltrane night).
Coltrane Peak is the first progression-gated Generator — it opens only after the four any-order regions all clear, so most players arrive here with a sharper toolkit and a more disciplined dash budget than they brought to the Septemburg or Bone Beach gates.
FACT-CHECK ANCHOR
Region placement, boss roster and arena geometry fact-checked against the in-clip room nameplates and the Kakuchopurei ALL BOSS FIGHTS compilation. Attack patterns / counters authored from frame-by-frame review. Each attack's source_url anchors to the timestamp at which it first appears. The Icebound Cavern boss's true canonical name remains open (Frozen Horror vs Astromancer vs literal in-room "Icebound Cavern boss") — see project tech notes.
Icebound Cavern boss
Icebound Cavern boss
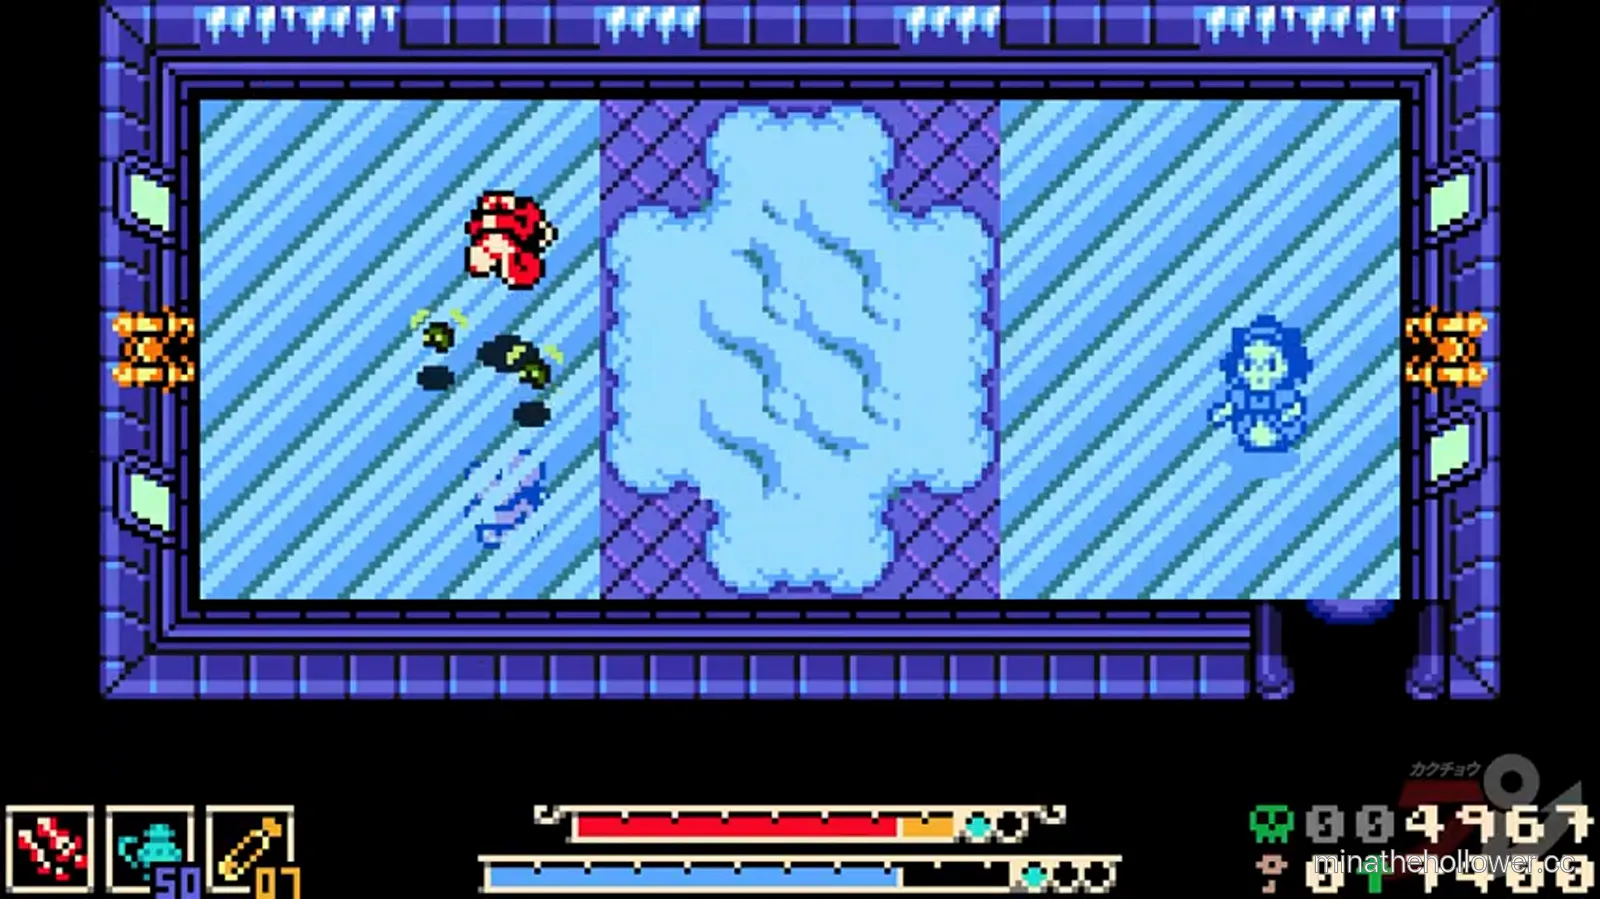
Frame from Kakuchopurei · clip @ 42:23
The arena, on first read
The arena is a vertical ice-cavern with three lanes: blue-stripe (left) + central ice path + blue-stripe (right). The side stripes are slippery — Mina's dash distance is slightly longer on them and the turn-around lags by a frame or two. The central path is normal traction.
This is the first main-path arena where the floor material itself is a mechanic rather than a hazard. The slip changes your dash budget by about 20% per dash and stacks if you commit two consecutive dashes on the same stripe. This sounds small but it adds up across the 2-minute fight — players who never use the centre path repeatedly overdash past their intended position.
Attack 1 — Ice-shard drop
6 icicles fall from the cavern ceiling along the middle lane. Track the shadow indicators on the floor and step into a safe column — every second column is safe by default, but the pattern shifts each volley so confirm the shadow markers before committing.
The icicle fall is a fast tell (half a beat between the shadow appearing and the icicle landing) but the shadow markers are unmistakable and the six tiles are visually distinct from the safe columns. Dodge sideways to a safe column; do not dash through a marked tile thinking the icicle will land too slowly to catch you.
Attack 2 — Frost-doll summon
The boss splits its body and two small frost minions detach. They die in one weapon hit each; clear them before the next ice-shard pattern fires.
The summon timing is the fight's pressure source — the boss queues a frost-doll summon roughly every other rotation, and dolls that aren't cleared before the next shard pattern start eating dash budget through the volley dodge. Bait them onto the side stripes if you can — the slippery floor doesn't help them aim, and the spacing of the dolls makes them easy to clear with a single horizontal weapon swing.
Attack 3 — Vertical-lane hazard (the slip mechanic)
The stripe lanes' slippery traction can be weaponised — use the slide to extend reach toward the boss centre when committing to a punish. Dash from the centre path into the stripe lane during a recovery window and Mina's slide carries you an extra tile, which lets you land a hit on the boss from outside the boss's standard punish range.
The trade-off is dash-budget cost: the slide adds roughly 30% to the recovery time. Only use the slip-dash if the boss is locked in a recovery animation; never use it as a defensive dodge.
Common deaths
- Ice-shard mistread. Players who reactively dash during the drop often land in the next column over, which the icicle pattern catches. Fix: read the shadow markers before dashing.
- Frost-doll chip-stack. Letting dolls survive across two rotations bleeds HP through the volley dodge. Fix: clear them before each shard cycle.
- Slip overdash. Two consecutive dashes on the same stripe sends Mina past the intended position and into the next icicle column. Fix: alternate dashes between centre and stripe.
Tier justification — why Icebound Cavern boss is B-tier
The fight sits at B-tier because the core read (shadow markers + diagonal safe columns) is taught explicitly by the arena and the boss attacks are well-spaced. The slip mechanic is the difficulty modifier — players who learn to read it clear in 2-3 attempts; players who fight against it can stall at 4-5 attempts.
Locomotress Agnes — the train-top pursuit
Locomotress Agnes
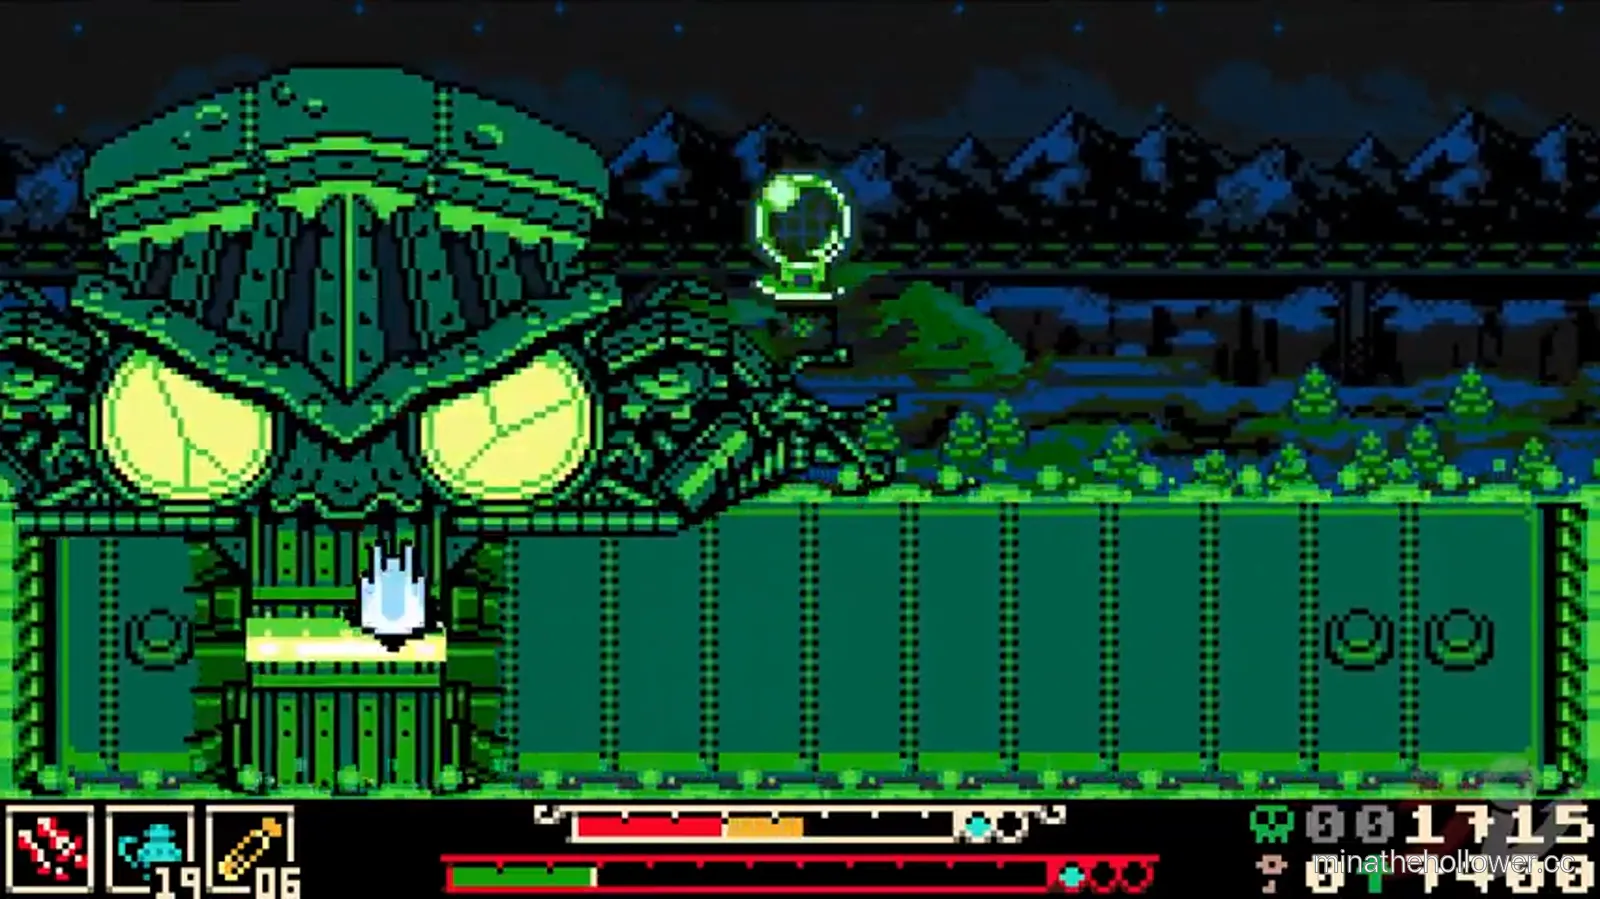
Frame from Kakuchopurei · clip @ 47:19
The arena, on first read
Locomotress Agnes is a green locomotive boss with yellow eye-headlights and a stack/funnel that lobs glowing green skull projectiles. The arena is the top of Agnes herself — Mina rides the train roof through the snowy Coltrane night. The arena has limited horizontal space: over-dashing off either side rail is a one-shot fall, which is the fight's signature lethality vector.
The vertical scroll of the snowy night through the background is visually impressive but mechanically irrelevant — Agnes's attacks all fire in train-roof coordinates, so the scroll is purely cosmetic.
Attack 1 — Skull projectile toss
Steam puffs from the funnel a beat before each toss; the skull arcs land in 1-3-shot fanned spreads. The fan widens with the toss count — single skulls land on Mina's current tile, 2-skull fans split into adjacent tiles, 3-skull fans cover a wider arc.
Dash toward the projected landing zone before the skull leaves the funnel. The steam puff is the lock-in frame; once the skulls launch, the landing positions are committed.
The 3-skull variant is the only attack in the fight that demands arena-wide movement. Identify the toss count from the funnel puff intensity (a single puff for the 1-shot, double for the 2-shot, triple for the 3-shot — the audio cue is also distinct).
Attack 2 — Side-wheel sparks
Horizontal sparks travel along the bottom rail when the wheels speed up. Stay centred on the train top; the spark line covers only the outer rails. The wheel-spin sound effect is the lock-in tell — distinct from the chuffing of the boiler.
Once the sparks light the outer rail, the rail is dangerous for the entire rotation. Reset to the centre column the moment the wind-up fires; the sparks dissipate after the rotation, opening a brief safe window before the next attack queues.
Attack 3 — Eye-beam sweep
Yellow eye-headlights flash brighter for a beat, then a horizontal beam sweeps across the train top. Position above or below the beam height before the eyes brighten — the brighten is the lock-in frame, and the sweep travel is fast enough that reactive dodging after the brighten often clips the edge of the beam.
The sweep covers one horizontal row at the boss's eye level; the row above and the row below are safe through the entire animation. Bias toward the bottom row because it leaves more punish room for the next skull toss.
Common deaths
- Falling off the train. The single most common Locomotress Agnes death. Players who dodge skull spreads or eye beams toward the side rail without tracking the rail edge fall off into the snowy night. Fix: never dash sideways past the bottom row.
- Reading eye flash as a wind-up rather than a lock-in. The flash is the commit frame, not the warning. Fix: position before the eyes brighten, not after.
- Sparking through the wheel-spin. Players who treat the spark line as a momentary hazard rather than a per-rotation rail closure repeatedly try to dash through it. Fix: the rail is closed for the full rotation; reset to centre.
Tier justification — why Locomotress Agnes is A-tier
Locomotress Agnes lands one tier above the Icebound Cavern boss because the limited horizontal space + the fall-off lethality combine into a positional discipline test that the Icebound arena doesn't impose. Players who clear the Icebound boss on attempt 2-3 often spend 4-6 attempts on Agnes because the fall-off mistake is binary: any sideways dash past the bottom row ends the run.
Pro tips (both fights)
- Use the centre path for every Icebound reset. The centre path is normal traction; the side stripes are the slip mechanic. Slip-dashes are punish-only, not defence.
- Skull-fan count = funnel puff count. Read the puff intensity to predict the fan width before the skulls leave.
- The eye-beam safe lane is the bottom row. Bias positioning toward the south edge of the train roof for both the eye beam and the next skull toss.
- Mirren is in this region — a secret boss gated behind a side-room trigger inside Coltrane Peak. See Secret bosses hub.
Speedrun notes
The Icebound Cavern boss yields to a strict 2-shard-cycle dodge + 3-hit pulse-reset rhythm; clean kills run around 1:30.
Locomotress Agnes is slower because the skull-toss recovery is the only reliable damage window. Players who can read the 3-skull-fan variant on the first puff intensity often skip the fall-off mistake entirely and run 1:45-2:15 kills.
Lore notes
Coltrane Peak's framing is "frozen trainyard" — wiki.gg uses the term "Frozen Trainyard" for the region's interior sub-area, but the mainstream SEO term across GameSpot and hollower.org is Coltrane Peak. We use the latter to match search intent. The two main bosses share the region's transit-and-cold framing: the Icebound Cavern boss is a frost-crown humanoid; Locomotress Agnes is a train made boss.
The boss-name candidacy for the Icebound Cavern boss is unresolved. The room nameplate reads "Icebound Cavern" but the boss banner has not been clearly OCR'd from the source frames; mainstream community clusters around "Frozen Horror" but we will not commit to that name until wiki.gg publishes the canonical one (R5).
Mirren is the region's secret boss, gated behind a side-room trigger. Exact trigger location is pending verification — possibly tied to a specific NPC dialogue or a hidden frost-doll path.
Frequently asked
Which Coltrane Peak boss comes first? The Icebound Cavern boss gates the first half of the region. Locomotress Agnes is the back-end boss, fought after the Frozen Trainyard interior segments. You don't pick the order.
Are either boss missable? No. Both are required for the regional Spark Generator beacon, which is built into the post-Agnes exit.
Does Coltrane Peak have a tower climb? No. Coltrane Peak is not one of the three tower-climb regions (those are Queensbury Crypt, Nox's Bayou, Astral Orrery).
What is the canonical name for the Icebound Cavern boss? Open question. The room nameplate inside the source clip says "Icebound Cavern" but the boss banner has not been clearly captured. Community-side names cluster around "Frozen Horror" but we don't commit until wiki.gg verification lands.
Is Mirren one of the main bosses? No. Mirren is the region's secret boss — optional, gated behind a side-room trigger. See Secret bosses hub.
Best trinket for Coltrane Peak? Specific picks land with the /trinkets/ P3 page. Community guides reference a Coltrane-specific cold-resistance trinket as a quality-of-life pickup inside the region; the slot name is pending verification.
What to do after these fights
- Coltrane Peak walkthrough for the rest of the snow-mountain traversal + Frozen Trainyard interior.
- The final region — Astral Orrery — opens after Coltrane Peak. Lionel ends the campaign here.
- Mirren secret-encounter trigger.
- For the difficulty arc: All bosses hub shows where the Icebound and Agnes fights sit relative to S-tier composites (Thorne, Lionel).
- Endings tie-in: Coltrane Peak's region-state caption in the observed ending is still pending sub-caption verification — see all endings explained.
PATCH MAINTENANCE Tactics here verified against patch 1.0.0 on 2026-05-31. If a future patch tunes the slip-floor traction or the skull-fan toss count we update this page within 24-72 hours and bump the patch line in the footer.