Bone Beach's giant-skeleton mining town houses two boss fights: Major Miner (a mining robot/golem with mechanical arms in a blue pit arena) and Mined Mind (a pulsing brain in a flesh cavern with 8-direction radial projectile spread). Major Miner is the region's mid-point gate; Mined Mind caps the region and unlocks the regional Spark Generator beacon — Bone Beach has no separate tower-climb segment.
These two fights together teach Mina players a positioning principle that pays off in Coltrane Peak and Astral Orrery: the kill target's fixed-position attack patterns are read as fields, not as projectiles. Major Miner's lightning arc and Mined Mind's radial spread both reward gap-mapping over reaction dodging.
FACT-CHECK ANCHOR
Region placement, boss roster and arena geometry fact-checked against the in-clip boss banners and room nameplates in the Kakuchopurei ALL BOSS FIGHTS compilation. Attack patterns / counters authored from frame-by-frame review of the compilation. Each attack's source_url anchors to the timestamp at which it first appears.
Major Miner — the mining robot
Major Miner
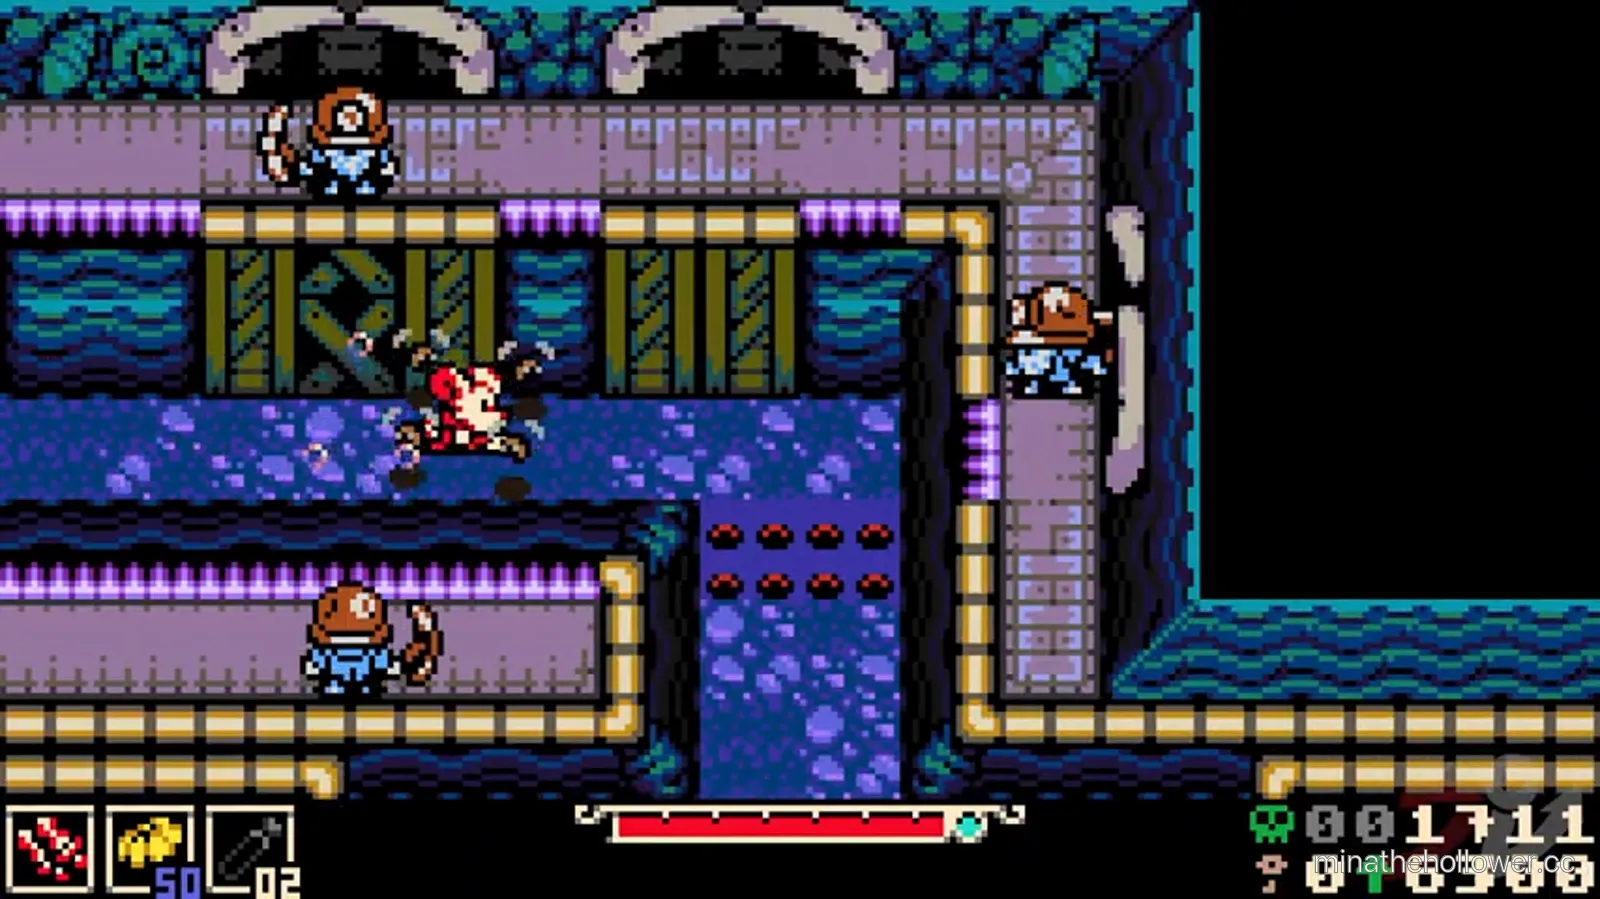
Frame from Kakuchopurei · clip @ 28:51
The arena, on first read
The arena is a blue mining pit with red spike strips on the left and right walls. The pit floor is wide enough for centred dodges to have room on both sides, but tight enough that panic-dashing toward either wall pins you against the spikes. The mining-robot sprite is large and mechanical — fist-sized arms, blue-lit chest plate, fixed central torso. The boss is mostly stationary; the fight is a positioning puzzle around three attack vectors.
Three things matter:
- Lightning arc fires across the pit floor at one of three fixed heights — north row, centre row, south row. Move into one of the two rows it's not using.
- The boulder hurl lobs from the back wall — readable arc, full beat of travel, lands on a 2x2 AOE.
- Spike strips along the side walls delete you instantly if you back-dash into them under pressure. Maintain a one-tile buffer.
Attack 1 — Lightning arc (the row game)
The arc is the cleanest read in the fight. The boss's chest plate sparks blue and the arc forms as a chain of light tracing across one of the three pit-floor rows. The wind-up is roughly one beat between the spark and the discharge — enough time to identify the row and reposition.
The two non-active rows are safe through the entire arc travel. The arc covers the row's full horizontal length, so vertical dodging into the wrong row is the only failure mode. Bias toward the south row during the centre-row arc and toward the centre row during the south arc; the centre row is the safest default reset position because both boulder-hurl arcs land on either side of it.
Attack 2 — Boulder hurl (the lob)
A 2x2 AOE chunk lobs in a readable arc from the boss's back wall. The landing zone is shadow-indicated on the floor a full beat before impact. Track the shadow, dash off the marked tile before impact — this is the same pattern as the Nox Beast lunge tell, but slower and more forgiving.
The boulder leaves a brief impact AOE on landing (one beat). Do not dodge into the impact zone before it dissipates. Two boulders cannot fire simultaneously, so the dash budget after the dodge is clean for the next attack.
Attack 3 — Spike-strip bracket (always-on)
Not an attack — the side walls are a passive hazard. The strips delete adds for free if you can lead enemies into them, but they will also delete Mina if you back-dash into them under pressure. Maintain a one-tile buffer from both side walls throughout the fight.
The clean rotation
Lightning arc → identify active row, reposition to centre row → boulder hurl → dash off shadow indicator → 2 weapon hits on the boss chest plate during the post-boulder recovery → reset.
Common deaths
- Spike-strip back-dash. The most common Major Miner death. Players who panic-dash away from the lightning arc plant Mina straight into the side spike strip. Fix: dodge into the safe row, never away from the boss.
- Boulder landing-zone miscount. The shadow indicator is on the floor for a full beat, but the AOE lingers another beat after impact. Players who dash through the cleared zone too early eat the lingering damage. Fix: wait for the AOE to dissipate before crossing.
- Boss-plate over-commit. Three weapon hits during recovery overlaps with the next lightning spark — the third swing animation can't be cancelled into a dodge. Fix: two hits, then reset to the centre row.
Tier justification — why Major Miner is B-tier
Major Miner sits at B-tier because each attack is independently easy to read but the arena hazard (spike strips) compounds positional mistakes. Clean reads clear in 2-3 attempts; sloppy positional discipline can stall a run at 5+ attempts on this one fight.
Mined Mind — pulsing brain with radial spread
Mined Mind
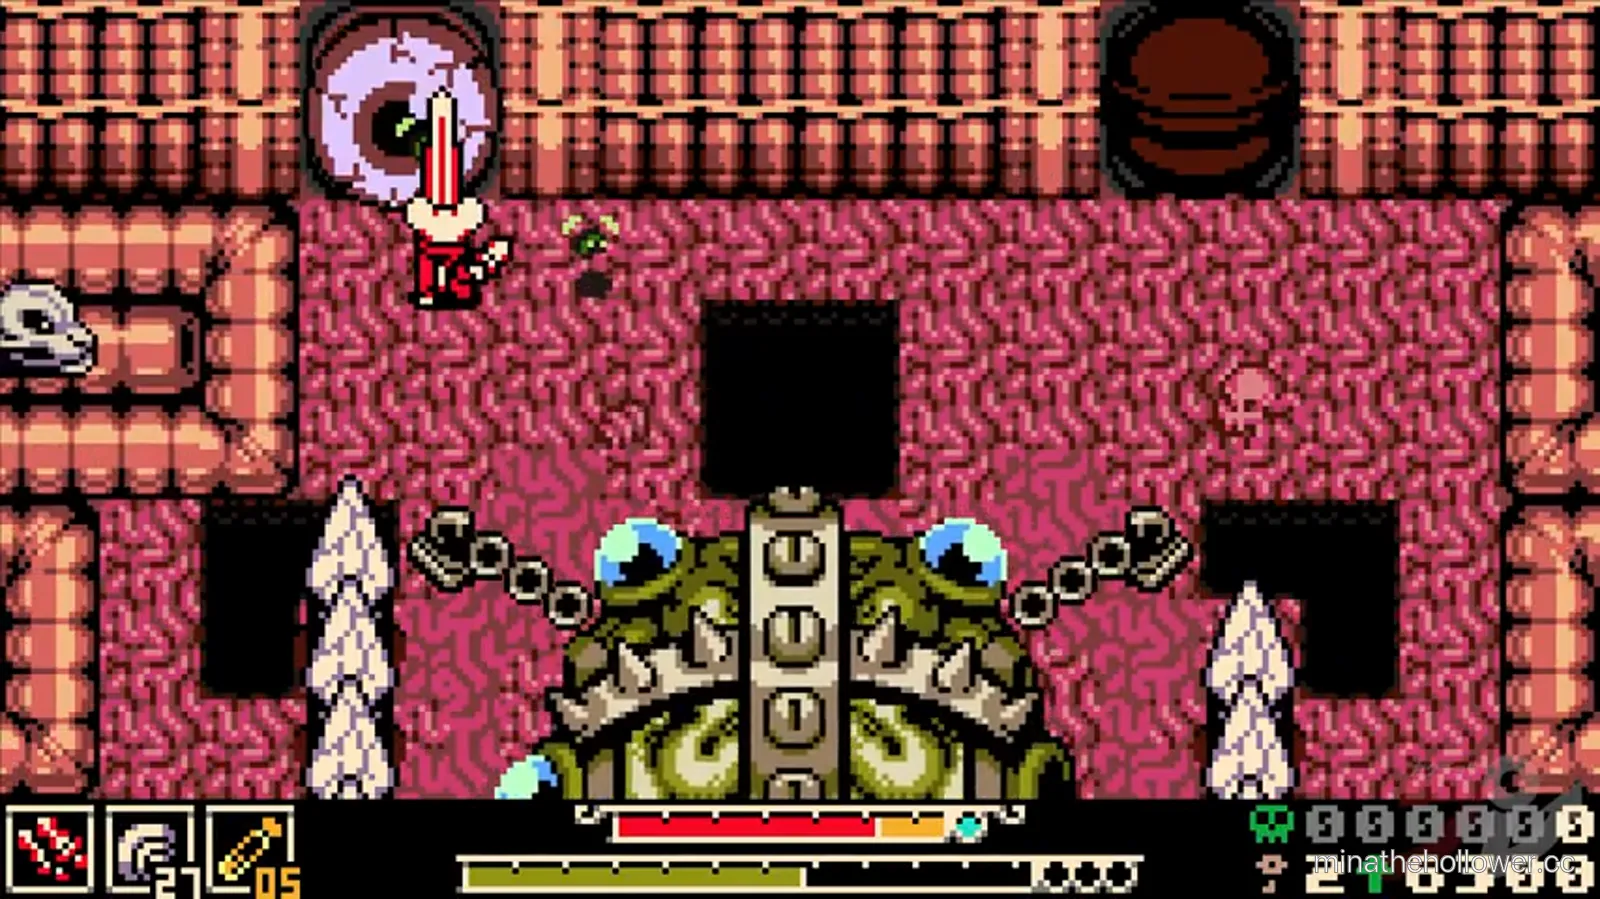
Frame from Kakuchopurei · clip @ 31:38
The arena, on first read
The arena is a dark stone chamber with stalactite-like overhead spikes; the floor is flat without the tier-and-strip layout of Major Miner. The brain sprite is the kill target and stationary — the fight is a positioning puzzle around its 8-direction radial spread and a curved tentacle whip.
The brain pulses bright green for half a beat before each spread fires. That flash is the only warning, and the spread doesn't track Mina mid-cast. Once you're in a diagonal gap you're safe for the wave.
Attack 1 — Mind-blast spread (the diagonal gap)
8 teardrop projectiles fire from the brain's centre in a radial wave. The cardinal directions (N/S/E/W) are dangerous; the diagonals (NE/SE/SW/NW) are the safe lanes. Dash into the diagonal gap before the spread locks. Once the wave fires, the gap is open for the entire wave travel — no follow-up correction needed.
The wave does not return — once it expands past the arena edges, the projectiles vanish. There's a brief idle window after the wave clears before the next attack tell.
Attack 2 — Tentacle whip (the wall sweep)
A pink fleshy tentacle sweeps across half the arena from the brain's base. The arc origin is fixed at the brain's south edge; the safe half is always the opposite half of where the tentacle is forming.
Tell: the tentacle forms visibly before sweeping — roughly half a beat of warning. The whip animation is faster than the mind-blast spread but the safe half is bigger, so the dodge is positional rather than reactive.
Attack 3 — Pulse reset idle (the punish window)
Soft texture cycle with no bright green flash. This is the main punish window: close on the brain, slam in 2-3 weapon hits, bail before the next pulse tell.
The reset is roughly two beats long. Greedy 4-hit punishes catch the next spread; the safe commitment is 2-3 hits then reset to a diagonal position pre-spread.
The rotation
Mind-blast spread → dash into diagonal gap → tentacle whip → reposition to safe half → pulse reset → 2-3 weapon hits on brain centre → reset to diagonal pre-spread.
Common deaths
- Cardinal-direction dash. Players who dash N/S/E/W away from the spread die to the projectile lanes. Fix: the cardinals are exclusively dangerous; the diagonals are exclusively safe.
- Tentacle whip from a centred position. Standing at the brain's south edge during the tentacle wind-up plants Mina in the sweep origin. Fix: maintain a half-arena buffer from the brain base.
- Pulse-reset over-commit. Four weapon hits during the reset catches the next spread wind-up — the fourth swing can't cancel into a dodge. Fix: three hits maximum.
Tier justification — why Mined Mind is A-tier
Mined Mind earns A-tier because the radial-spread read is the first main-path mechanic that demands geometric thinking (cardinal vs diagonal) rather than lane-counting (1-of-3 spore lanes). Players who internalise the diagonal-safe rule clear in 2-3 attempts; players who try to dodge reactively against the cardinals stall at 5+ attempts. The fight is a difficulty step-change from Major Miner.
Pro tips (both fights)
- Major Miner's centre row is your default reset. Both boulder arcs land on either side of it, and the lightning arc threatens it only one-in-three rotations.
- Mined Mind's diagonal-safe rule never breaks. Even on the tentacle-whip half, the diagonals stay safe; the rule applies to every attack in the fight.
- The brain's pulse-reset is your weapon DPS window. Save swings for it; the spread recovery is too short to land hits cleanly.
- Bone Beach has no Spark Generator tower climb. The activation is built into the Mined Mind arena exit. The three tower-climb regions are Queensbury Crypt, Nox's Bayou, and Astral Orrery — Bone Beach is not on that list.
Speedrun notes
The fastest Major Miner kills land 2 hits per boulder recovery exclusively, skipping the lightning-arc punish window. Clean 4-cycle Major Miner kills run around 2:00.
Mined Mind speedruns commit 3 hits per pulse reset and absorb the tentacle whip on the safe half without dodging — the whip is wider than the dodge requires and standing still on the safe half is slightly faster than dashing. Clean kills run around 1:45.
Lore notes
Bone Beach's framing is environmental — the entire region is built inside the ribcage of a giant skeleton (rib-bone arches overhead, skull-shaped wall sconces, bleached-white bones jutting out of the ground). The two bosses are the region's mechanical and biological threats respectively: Major Miner is a mining-robot industrial imposition; Mined Mind is the bone village's organic counterpart, a pulsing flesh-organ at the bottom of the mineshaft.
The "Fused Bonestone" celebration screen at compilation t≈7:30:00 (during the source playthrough) marks the post-Major-Miner economy beat — the Bonestone counter visible on screen ("4145 → 7938") is the reward delta for clearing the gate boss. The Bonestone economy is the region's currency mechanic; it doesn't directly affect the Mined Mind fight.
Frequently asked
Which boss comes first? Major Miner gates the village interior; Mined Mind caps the region's mining-shaft descent. You cannot skip Major Miner to reach Mined Mind.
Are either boss missable? No. Both are required for the regional Spark Generator beacon, which is built into Mined Mind's arena exit.
Does Mined Mind have a tower climb? No. Bone Beach is not one of the three tower-climb regions — the Spark Generator activates in the Mined Mind arena exit instead.
What's the best dodge against the radial spread? Diagonal. The 8-projectile wave fires on the cardinals; the four diagonal gaps between projectiles are safe through the entire wave.
Do I need a frost-resistance trinket? No — that's Coltrane Peak. Bone Beach has no temperature mechanic.
What to do after these fights
- Bone Beach walkthrough for the vertical mining-town traversal + Bonestone economy beats.
- The gated rotation opens next: Coltrane Peak (Icebound Cavern boss + Locomotress Agnes) then Astral Orrery (Lionel final boss chain).
- For full difficulty comparison: All bosses hub.
- Endings tie-in: Bone Beach's region-state caption in the observed ending reads "PLUNDERED AND LEFT IN PEACE" — see all endings explained.
PATCH MAINTENANCE Tactics here verified against patch 1.0.0 on 2026-05-31. If a future patch tunes the lightning arc lane spacing or the radial spread cadence we update this page within 24-72 hours and bump the patch line in the footer.