Ossex is the central hub — three boss-tier fights anchor this page. Hulk Trooper is the first armed humanoid most players read as a real boss, Maxi is the comic-rival whip duel that runs in the same stone-and-grass corridor, and Thorne is the composite three-encounter boss whose final phase trades his sword duel for a corrupted purple wolf-form.
Ossex is the only region that anchors three boss fights into a single hub map — the Generator regions cap on one or two bosses each. The hub treatment means players cycle through Ossex multiple times across the campaign (every Generator clear bounces back to the plaza-centre shrine), and the boss triggers fire only at the story beats that specifically unlock them.
FACT-CHECK ANCHOR
Region placement and boss roster fact-checked against the GamerGuides Ossex prologue walkthrough and the project's own scout report (docs/research/scout-opportunity.md, addendum). Attack patterns / counters authored from frame-by-frame review of the Kakuchopurei ALL BOSS FIGHTS compilation. Each attack's source_url anchors to the timestamp where it first appears in that clip; watermarks baked into each .webp at capture.
Hulk Trooper — the first wall
Hulk Trooper
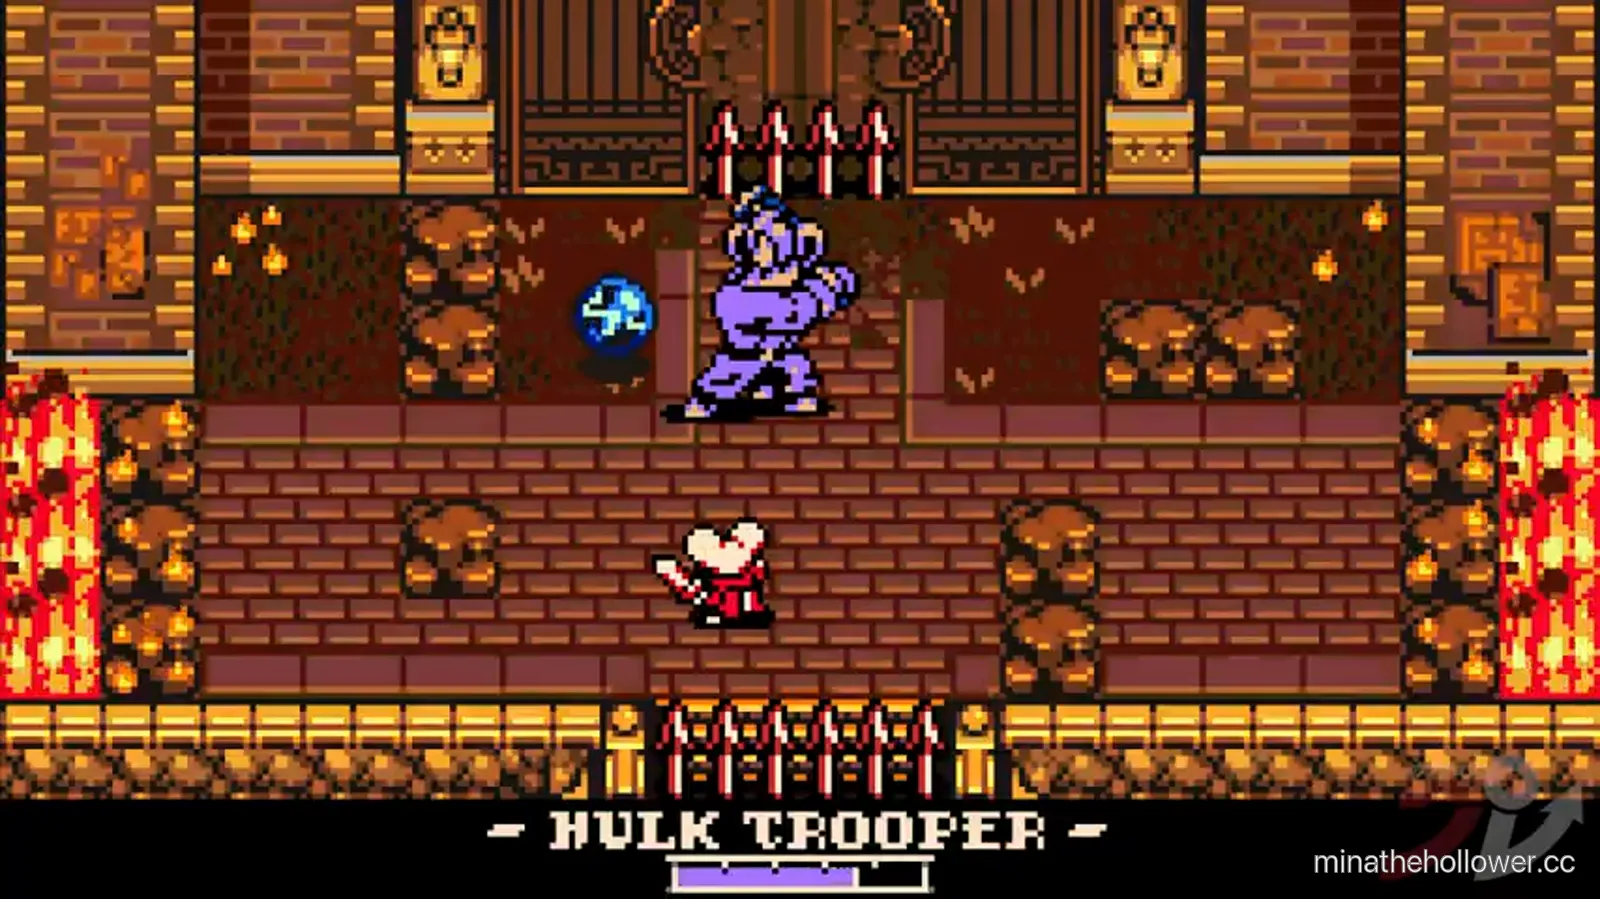
Frame from Kakuchopurei · clip @ 1:45
The Hulk Trooper boss banner is your first confirmation that the Ossex hub is not a walkthrough corridor — it is a combat tutorial. The fight teaches three reads:
- Cyan orb throw is the long-range tell. He raises the orb overhead, you strafe horizontally, the orb explodes on the floor where you used to be.
- Shoulder charge is the melee commit. He plants both feet and leans back — dodge north or south, never straight back into the spike strips.
- Idle stance reset is your punish window. Slam in 1-2 weapon hits per stance reset; greed gets caught by the next shoulder charge.
Frame-by-frame: the orb throw
The orb throw fires in three beats: overhead raise (one beat of wind-up) → orb peaks (lock-in frame, position commits) → orb lands on Mina's prior position with a 1-tile AOE. The lock-in is the orb peak; strafing after the peak doesn't move the landing zone.
Misread: strafing only one tile horizontally. The AOE radius covers one tile in any direction from the landing centre, so strafing one tile catches the edge. Fix: dash two tiles or diagonal-dash to clear the AOE entirely.
Frame-by-frame: the shoulder charge
The charge fires in two beats: plant-and-lean (lock-in) → travel (active across full charge length, 3-4 tiles). Recovery at the end of the charge is one beat of stationary stance — the primary punish window.
Misread: straight back-dash. The arena's bottom wall has a spike strip; back-dashing during the charge wind-up plants Mina in the strip. Fix: always dodge perpendicular to the charge line (north or south, given an east-west arena), never away from the boss.
Why the spike strips matter
The arena is a two-tier brick corridor flanked by lava-fire pillars on both side walls and red spike strips along the top and bottom walls. The strips are the most common death in this fight: a panic back-dash during the orb wind-up plants Mina straight into the bottom strip and ends the run in one hit. Always dash perpendicular to the boss, never away from him.
Common deaths
- Back-dash into the bottom strip. Already detailed above.
- Orb-AOE edge clip. Strafing only one tile leaves Mina at the AOE's edge. Fix: two-tile strafe or diagonal dash.
- Charge-recovery over-commit. Three weapon hits during the stance reset catches the next orb wind-up. Fix: two hits.
Tier justification — why Hulk Trooper is B-tier
Hulk Trooper sits at B-tier because the three attacks are well-spaced and well-telegraphed but the arena hazard (spike strips) compounds positional mistakes. Players who never back-dash clear in 2-3 attempts; players who panic-dash repeatedly stall at 5-8 attempts.
Maxi — the whip-duel comic rival
Maxi
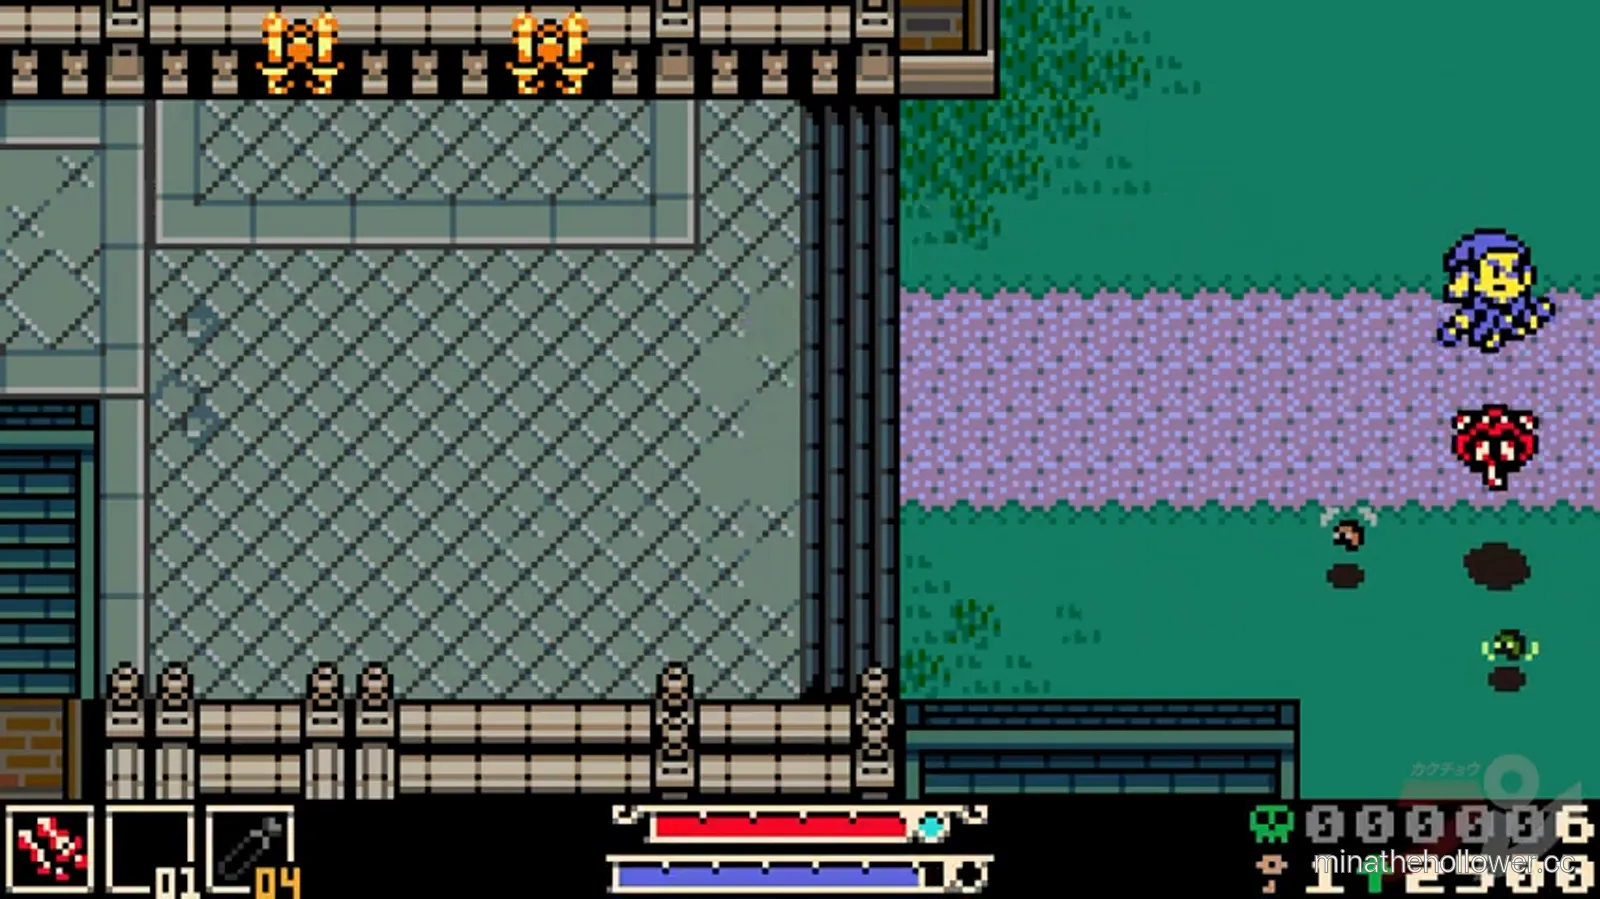
Frame from Kakuchopurei · clip @ 12:39
Maxi is a one-trick chain-whip duel in the same stone-and-grass corridor. Dying to him should not happen after the second attempt — the whip lashes in one straight line and a perpendicular sidestep clears the entire hitbox.
The defeat dialogue ('What the whip?! I lost by an inch! Your kind always che...') frames Maxi as a recurring comic-relief rival rather than a real threat. Treat the fight as a dash-rhythm drill: lash, dodge, slam, reset.
Tier justification — why Maxi is C-tier
Maxi sits at the bottom of the tier chart. The single attack pattern, the slow recovery, the wide arena, and the narrative framing all point to a teaching fight rather than a difficulty test. Most players clear in one attempt.
Pro tip
The defeat dialogue's "I lost by an inch! Your kind always che..." line is foreshadow for Maxi's recurring appearances elsewhere in the campaign — he's framed as a rival rather than a one-and-done boss. The dialogue cuts off mid-word as part of the design beat.
Thorne — the three-encounter S-tier composite
Thorne
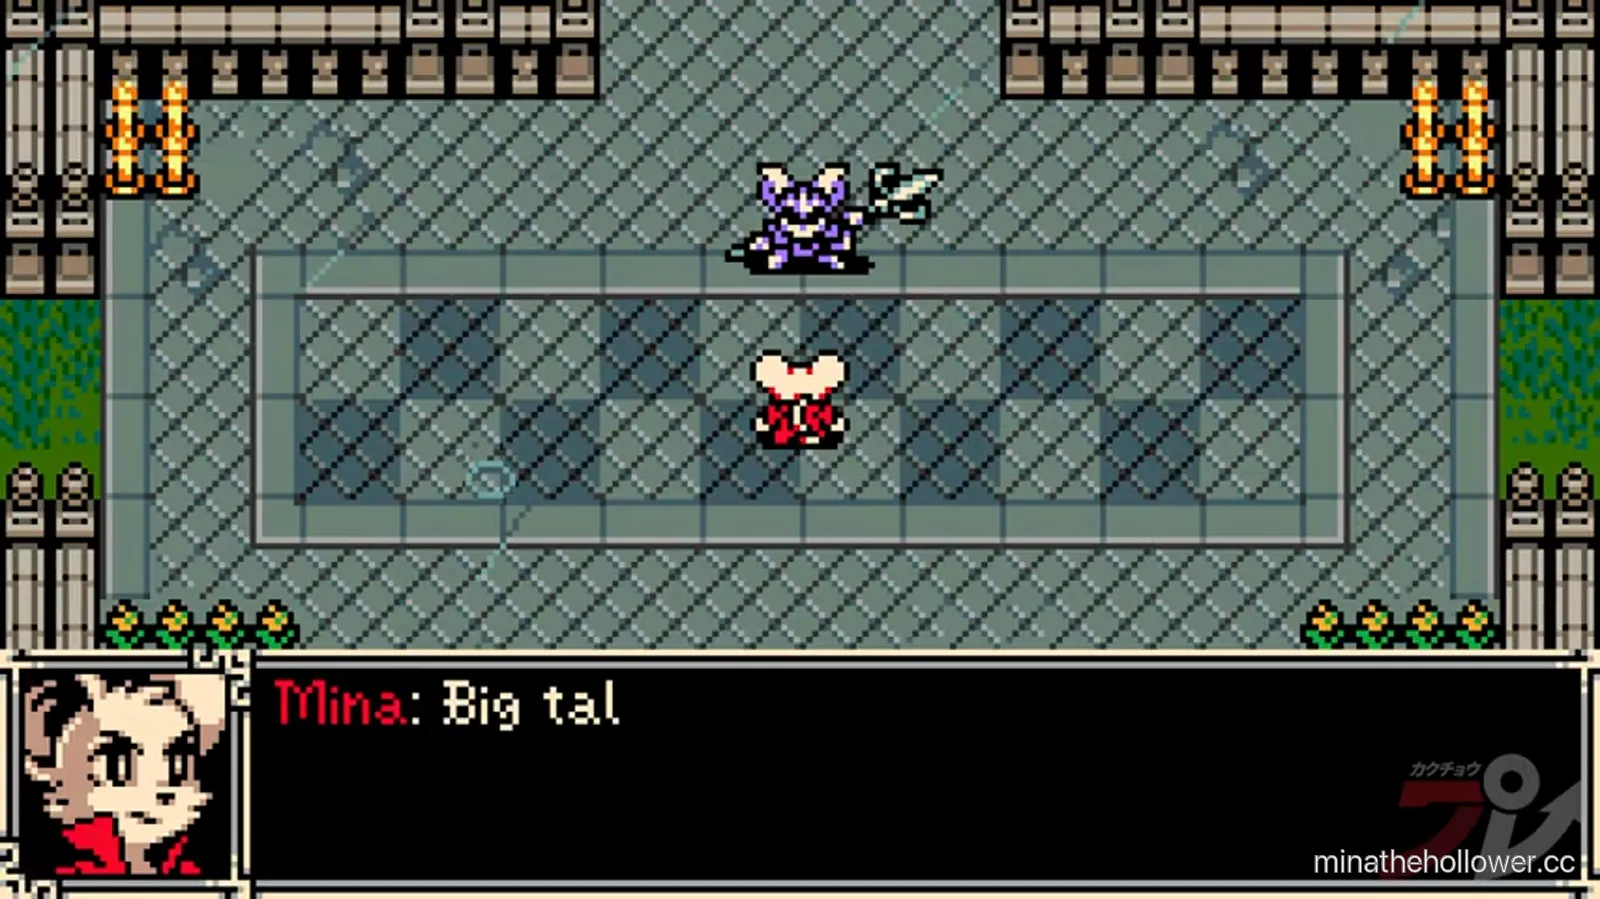
Frame from Kakuchopurei · clip @ 2:36
Click the PHASE 1 / PHASE 2 / PHASE 3 tabs above to switch encounters. Thorne is one boss across three fights — a Friede/Owl Father composite treated on a single page so the 'how to beat thorne' SEO intent doesn't fragment.
Phase 1 — Radiant Manor sword duel (t≈2:21–4:54)
The opening encounter inside the Radiant Manor courtyard. Thorne is a white-furred cat-form with a blade and a fencer's lunge. Three attacks to read:
- Horizontal blade thrust is the main commit. Single-lane lunge — circle behind for the punish. The blade flashes white before the thrust; the flash is the lock-in.
- Teleport + ground AOE is the pressure reset. Fade-out → reappear at perimeter → AOE plants where you were standing. The fade is the lock-in; the reappear position is fixed at the arena perimeter.
- Skeleton guard summon is the low-HP closer. Two skeletons fade in along the top wall; clear them before committing on Thorne.
Misread on phase 1: chasing Thorne during the teleport. The fade-out plants Thorne at the perimeter regardless of player position; chasing the fade wastes dash budget and puts Mina in the AOE's landing zone. Fix: read the fade as a perimeter teleport, not a player-tracking move.
Phase 2 — Mid-game return (t≈37:52–41:30)
The mid-campaign return encounter alternates between a train-car interior and a snowy exterior plateau. The carriage dash and the snowy leap slam are the two combat reads; the dialogue beats ('The only catastrophe is letting them remain. Mina. I won't stand by while you endanger us all! Away wi...') land the framing for phase 3's transformation.
The two-arena structure is unusual — train-car interior is tight (centre-line dodging), snowy exterior is wide (perimeter positioning). The arena swap fires automatically at the dialogue beat, not at an HP threshold; players who don't read the dialogue miss the arena cue.
Phase 3 — Corrupted wolf-form pre-final (t≈1:00:40–1:03:00)
The phase trades phase 1's blade duel for a wolf-beast pressure fight. The body itself is the hitbox — no slim weapon to dodge past, the whole sprite connects. The shadow projectile fan is the only ranged attack but its 5-6 fixed-angle lanes punish lazy reads.
This is the hardest sustained DPS check on the main path. Comparable in shape to Lionel phase 3 (the wolf-summon mechanic in Lionel echoes the wolf-form here directly).
Common deaths (Thorne composite)
- Phase 1 teleport chase. Already detailed above.
- Phase 2 arena-swap miscue. Players who miss the dialogue beat get caught mid-arena during the transition. Fix: read the dialogue, expect the swap.
- Phase 3 body-sprite trade. Trying to land melee hits while the body is in motion. Fix: the body is the hitbox; punish on recovery only.
- Phase 3 fan-lane lazy read. The 5-6 fixed-angle lanes punish centre-positioning. Fix: identify a single safe lane, commit to it.
Tier justification — why Thorne is S-tier
Thorne earns S-tier alongside Lionel because the three phases each require a different combat discipline (fencing dodge in phase 1, arena-swap positioning in phase 2, wolf-form pressure tanking in phase 3) on three separate life pools — but a story flag tracks the composite across multiple campaign returns. Players who clear phase 1 on attempt 2-3 often spend 4-6 attempts on phase 2 because the two-arena structure isn't taught elsewhere, and phase 3 typically takes 8-12 attempts because the wolf-form is the project's hardest sustained DPS check before Lionel.
Pro tips (all three fights)
- Hulk Trooper: the centre row is your default reset. Both spike strips bracket it but the orb-AOE lands away from it most of the time.
- Maxi: the whip is a single line. Sidestep, swing, repeat. The fight is a dash-rhythm drill.
- Thorne phase 1: the teleport is a perimeter move, not a player-tracker. Don't chase.
- Thorne phase 2: read the dialogue. The arena swap fires at the dialogue beat.
- Thorne phase 3: the body is the hitbox. Punish on recovery, not in motion.
Speedrun notes
The Hulk Trooper fight cycles fast on a 2-hit-per-stance rhythm; clean kills run 1:15-1:30. Maxi is the project's fastest boss fight; clean single-cycle kills run under 45 seconds. Thorne speedruns commit to a 3-hit phase-1 punish window during the lunge recovery; the phase composite runs 10-12 minutes end-to-end across all three encounters when chained.
Lore notes
Ossex is the survivor convergence point. The village safehouse (BeardBear t≈7:00:00) hosts multiple NPCs from the shipwreck — the purple-haired survivor Lady, a blue-furred rat with a sword, and a Trooper whose dialogue ("Yo, Mina! No way you'll catch Thorne before my squad do...") establishes the rivalry that pays off on Thorne phase 1.
Thorne's framing is the campaign's main antagonist beat for the mid-game. The phase 2 dialogue ("Mina. I won't stand by while you endanger us all!") frames Thorne as a moralised adversary rather than a pure villain — the wolf-form transformation in phase 3 is the consequence of the conflict, not its cause. This framing pays off in Lionel's phase 1 dialogue ("You became her worshipper..."), which positions Lionel as Thorne's narrative successor.
Frequently asked
Which Ossex boss comes first? Hulk Trooper triggers inside the village safehouse on a specific story beat — typically the first return to Ossex after the prologue. Maxi spawns as a roaming ambush in the stone-and-grass corridor. Thorne phase 1 fires after the Trooper dialogue thread clears.
Are any of these missable? Hulk Trooper and Thorne phase 1 are required for campaign progression. Maxi is a roaming-ambush boss who may be skippable depending on which dialogue tree fires first — but most players encounter him on a natural Ossex traversal.
Why isn't The Duke listed here? The Duke is an NPC + decision-tree story figure, not a boss. His content lives on Duke choice deep dive.
Where do Thorne phases 2 and 3 fight? Phase 2 is a mid-game return — train-car interior + snowy exterior plateau. Phase 3 is the pre-final encounter — corrupted wolf-form. Neither phase fires in Ossex itself; they're treated on the same page because the composite-boss IA decision keeps the SEO intent unified.
Is Dugin one of these bosses? No. Dugin is the region's secret boss — see Secret bosses hub.
What to do after these fights
- The next major encounter chain is in Queensbury Crypt — see the Duchess strategy guide.
- The Duke encounter from Queensbury is not on this page — he is an NPC + decision-tree story figure, not a boss. Strategic context lives on the Duke choice deep dive.
- Full region traversal: Ossex walkthrough.
- Endings tie-in: the observed-ending region-state caption for Ossex reads "CHAOS FILLS THE STREETS" — see all endings explained.
- Difficulty arc: All bosses hub places Thorne and Lionel side-by-side as the S-tier composites.
PATCH MAINTENANCE Tactics here verified against patch 1.0.0 on 2026-05-31. Yacht Club has flagged "a couple of features in the pipe" + palette DLC; if telegraph timings shift in a future patch we update this page within 24-72 hours and bump the patch line in the footer.